Saturday, August 1, 2015

So You Want to be an Event Photographer?

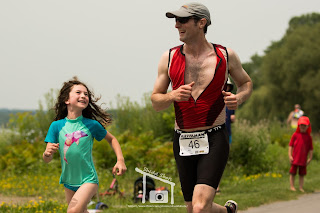
A few weekends ago, I went with a group of people headed up to Lake Geneva, New York for a weekend of triathlon competitions - Musselman 2015. Now, I had two main duties - to cheer my friends on, and to be the gear sherpa. Turns out that there is a lot of random clothing to carry along to set up for transitions between triathlon disciplines! I also had to bring my patience along, since the half Ironman event would take competitors between 4 and 8 hours to complete, so it wasn't all cheering and helping.

But, c'mon, this is me. I brought my camera along. And I decided that, rather than just getting shots of things that looked interesting, I would try and capture as many competitors as I could. For many folks, the sprint distance triathlon on the first day was their introduction to triathlon. So, all sorts of fun would be going on. For others, the half Ironman distance on the second day would be one of their big sporting achievements. Sounds like fun to capture! (You can view the results from the Sprint, and the Half Ironman.)

Amazingly, I planned ahead for this. I packed my laptop, and made sure that it was fully charged. Why on earth would I want my laptop with me, you might be wondering?

Simple - I wanted to ensure that I always had space on my memory cards. As I filled one up, a quick eject during a quiet moment, slip it into the SD card slot, and transfer away. This is where a camera like my Nikon D7100 is really awesome - it has slots for two memory cards.

Now, if you're doing an event, it is probably wiser to select that second slot as a backup to your main memory card (just make sure that the second card is the same size or bigger as the first!). I, however, am not wise, and just used the second card as standard overflow space. This allowed me to keep shooting as I transferred photos to my laptop.

The real work, in an event like this, comes when you get home, and have to sort through several thousand images (yeah, I was busy). I've competed in a number of races, and always get sent proof pictures from race photographers to purchase. By and large, these aren't artistic masterpieces - simple shots with no real framing aesthetic. I made a very conscious decision to NOT do this with my own photos. Which meant a lot of work in Lightroom.

A lot.

So workflow mattered here. And I did have to change how I normally do things. Did I individual edit every photo? Nope. Did every photo get edited? Yep. Here's how:


1) I began with a single photo, and edited it to look "nice" - Temperature, Contrast, Highlights, Shadows, and Vibrance were the main settings I worked on.
2) I selected that photo. Then, while holding "Shift" (Windows users), scrolled through to the end of the block of photos that had the same camera settings (shutter speed and f-stop), and had similar lighting conditions. Still holding "Shift," I then click that last photo - this selects that whole block.
3) Ctrl + Shift + S - this lets me apply select settings from my first image to the whole block. So I select the ones which I edited.
4) Scroll through, select the shots I want to export from RAW to JPEG, and export.
5) Repeat for each block.
6) Sleep, because this was a TON of work!


I learned some invaluable lessons from this - I was never a big "optimize my workflow" guy with Lightroom. I didn't shoot enough to really care if I wasted button clicks. But with this kind of volume? Optimize, optimize, optimize!

Also, it became apparent that I should learn to harness all that Lightroom can do. It's not Photoshop, but it's still extremely powerful. So I went out and snagged a used copy of Scott Kelby's "The Adobe Photoshop Lightroom 4 Book for Digital Photographers." And now, to read!


Equipment Used

Nikon D7100 Camera
70-200mm f/2.8 VR lens


Images

Sunday, July 5, 2015

Building Panoramas, Or Why Your Smartphone Alone Isn't Enough

As readers of this blog may know, I try to get outside and enjoy the natural world with my camera. And as I get more and more interested in what's out there, I seem to keep upping the ante a bit! This latest adventure involved spending 8 days on the glaciated slopes of Mount Rainier. Initially, I planned to bring my D7100, complete with specialized DIY carrying case - but when my pack weighed in at 68 pounds before adding the 3lbs of DSLR goodness, I decided to limit myself to my Samsung Galaxy S5.

Now, I've used my Galaxy S5 before on this blog, and the results were more artistic than photo realistic. You can bet that as I left my D7100 behind, I was thinking about this a lot. But, as we settled in for the night at our first camp site, I realized that I shouldn't be worried. Why, you ask? Because of the great free photo stitching software, Hugin! Sure, I'd be limited in megapixels. But I was in the middle of glacier, outside, taking landscape style shots. I could turn 10 photos into one with this software, and you'd never know that they came from a smartphone!

Let me pause here. You may be confused by what I've just said, and the title of my post. You're using your phone, silly! Why isn't that enough? Well, one other climber, our guide, Devin, took panorama shots nearly the same as I did. But he did it all "in cameraphone."


Courtesy Devin, at twitter.com/denalidevo

The photos are amazing, as you can see in this one example. But one thing comes into play here - distortion. It's that subtle fishbowl effect that appears when taking panoramas. It's not easy to get rid of, but it is possible - with software. And that's where Hugin comes into play.

In order to build the panoramas below, I took upwards of 10 individual photos. I basically created a grid of the scene that I wanted to capture, ensuring that there was plenty of overlap between each shot. This ensured that the software had many examples of common points in each set of images to stitch them together - aka do computer magic.

I began with seven separate photos


Lots of control points make for more accurate stitching

Now, Hugin allows you a lot of control with photos. I should mention that I did all of my preliminary post-processing in Lightroom. White balance, exposure levels, minor edits - I performed this on one image in Lightroom, and then batched the settings to the other six images. This ensured that each piece of the larger puzzle looked the same - no odd underexposed sections here!

Once we have all seven images imported, and the software has identified the common control points, we get this output screen.  Here, I can select the type of projection that I want to base my image on. This is how we either eliminate (or increase) distortion, based on our artistic ideals for the image. Just check out my picture of the Emmons Glacier with Little Tahoma in the background - I went with some level of distortion to the picture, but that's just because I liked it that way.

Panini General Projection

Cylindrical Projection
Trans Mercator Projection

As is quite apparent, each projection created a very different image. The brighter areas are what Hugin would produce to create a "final" image. The cylindrical projection is what I made for my final image, so it is cropped properly, however the other two projections, while having the same dimensions, now include blank space within the final image. The Trans Mercator projection has also created that "fishbowl" effect that we saw in the smartphone image from Devin! But, our other choices eliminated that distortion. And this is precisely why you need a little bit more than just a smartphone to create a panorama - that is, if you want to avoid distortion!

Equipment Used

Samsung Galaxy S5
Hugin Version: 2012.0.0.a6e4184ad538


Images


Saturday, May 16, 2015

Beginner Concert Photography and the Sony RX100M III

After realizing that even a cell phone can snag halfway decent concert pictures, I started thinking about getting a "real" camera into a concert venue to get some shots. All of my reading and experimenting with basic lighting had me seeing the real magic of concert images - where else can you get the entire rainbow of color, mixed with true passion, and have a picture look REAL?

So, I started reading about on the web, and finding a camera that met the following criteria:
  • Would be allowed into the venue I had tickets for. 
    • Some places will let you bring in a full DSLR, no questions asked. Most will not.
  • Had a viewfinder. 
    • I've grown resistant to shooting via LCD screen, and it's annoying for other folks at a show.
  • Did good work in low light situations. 
    • You need a fast enough shutter speed to freeze performers, but also a camera that will give you low noise pictures at higher ISOs.
As you can tell from the title, I settled on renting Sony's RX100M III - a nice point and shoot that easily fit into my pocket and met all of the above criteria.

Naturally, I played with settings for a full day before the show, and made sure that I was familiar with the camera. After all, there is nothing worse than fiddling with a camera in the dark while you're trying to enjoy some music!


How I made my shots


  • Before the bands came out, I took a couple of test shots of the stage to dial in the right ISO setting. I started at ISO 2000, but brought it down to 1600 after the first few shots.
  • Most of my shots were at 1/125. I dropped a few down to 1/100 and even 1/80, but I was happiest with my 1/125 shots.
  • The RX100M III has a very nice Zeiss f/1.8-2.8 lens that shoots at 24-70mm. I spent a lot of time zoomed in, so I was at the slower end of things.
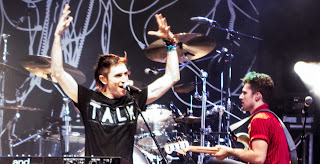
  • At a general admission show, I tried to frame as best I could and get the performers in focus. But I did a decent amount of spraying and praying. I'll let you judge how that worked.
I've got the final versions of my shots below, and have the untouched originals after that. Lightroom is a pretty powerful tool, and I'm getting to enjoy it more and more.


Equipment Used

Sony RX100M III camera


Final Images


Original  Images